
Reconfigure PuTTY for Remote Desktop Protocol (RDP) tunneling through ssh
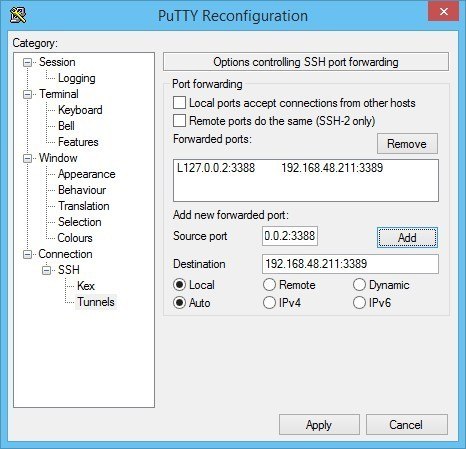
Once you are connected to your remote network with ssh/PuTTY, you need to reconfigure the connection to support SSH-tunneling. In the PuTTY Reconfiguration screen, go to Connection → SSH → Tunnels. This is where we can set up an SSH tunnel for Remote Desktop.
Under Source port, add your local IP address and port. Because the RDP 6+ client in Windows has issues with the loopback to TCP Port 3390, you need to use a different port. I use TCP port 3388 on IP address 127.0.0.2, and my remote internal IP address and RDP port 3389 as Destination (192.168.48.211:3389). See the image:
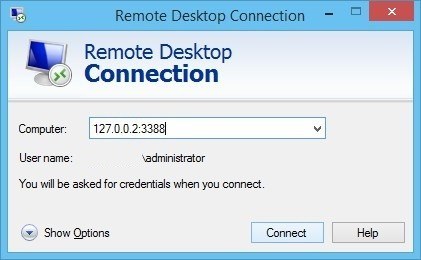
After clicking Apply, the SSH-tunnel for remote desktop is active, and you can connect the Remote Desktop Connection to 127.0.0.2:3388:
For Windows, PuTTY is the de-facto standard SSH client.
Tunnel RDP using OpenSSH and PowerShell in Windows 10
If you have the OpenSSH client installed in Windows 11/10, then you can use a command similar to Linux’ ssh tunnel:
ssh -N -L 13389:[Windows Server RDP address]:3389 [address ssh server] -l [ssh username]Code language: CSS (css)
To ease the usage, I wrapped in a PowerShell script, that connects to my on-premise stepping-stone host with ssh:
$remHost = (Read-host -Prompt ("RDP host: "))

Write-Output "Setting up an SSH RDP tunnel with ${remHost}"

Start-Process ssh -ArgumentList "-N -L 13389:${remHost}:3389 -l [ssh username] steppingstone-host.example" -Verb open

[void](Read-Host 'Press Enter to continue...')

&mstsc /V:localhost:13389 /w:800 /h:600 /prompt
Code language: JavaScript (javascript)
use this PowerShell one-liner to verify whether OpenSSH client is installed on your Windows 10 system. It should print Installed.
(Get-WindowsCapability -Online | ? Name -like 'OpenSSH.Client*').State